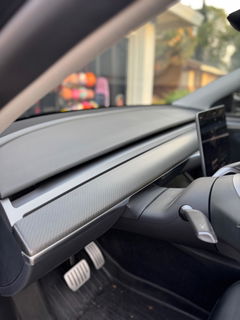
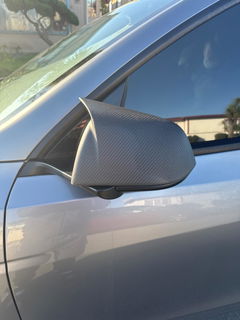
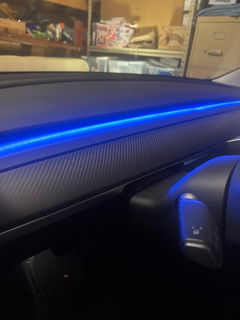
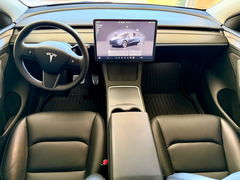
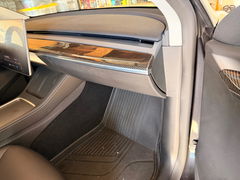
100% great quality amd wasy to repalce exact fitmemt
Great product looks amazing and great quality
I left you a review a month ago, and I still never received my fiber carbon license plate frame???




Give your dashboard a coordinated carbon fiber finish with TESERY overlays shaped for the original trim. Choose the upper panel, lower trim strip, or both to enhance the cabin while adding a protective layer over the covered surfaces.
Pair the broad upper panel with the matching lower strip for a coordinated look, or choose the individual piece you need.
Authentic woven carbon fiber brings depth and texture to the dashboard. Choose a subtle matte finish or a reflective glossy finish.
Pre-applied 3M automotive adhesive makes fitting straightforward. No tools, disassembly, or drilling required.


Formed dry carbon fiber overlays follow the dashboard's contours, with the woven material visible across the surface.
Matte softens reflections for an understated appearance. Glossy brings a more reflective surface that highlights the woven pattern. Both options feature a woven carbon fiber finish.
A UV-protective surface coating helps protect the finish. Pre-applied 3M automotive adhesive secures the overlays to the original dashboard trim.
The broad upper panel and narrow lower strip follow their corresponding dashboard surfaces. Rounded ends and shaped edges complement the original trim lines.
Select Upper, Lower, or Upper + Lower when ordering. Each option covers the existing trim without replacing the original dashboard components.

| Model 3 Highland | 2024+ Excludes Performance |
|---|---|
| Model Y Juniper | 2025+ Excludes Performance |
| Model YL | 2026+ |
| Steering Position | Compatible with left-hand-drive and right-hand-drive vehicles within the listed fitment. |
| Part Options | Upper / Lower / Upper + Lower |
| Finish Options | Matte / Glossy |
Select your exact model when ordering. Fitment for pre-Juniper Model Y, pre-Highland Model 3, and Model Y Standard has not been confirmed. Contact TESERY before ordering for an unlisted version.

Confirm your model, year, and trim, including whether it is a Performance version. Compare the upper panel, lower strip, end contours, and ambient-light position with your original dashboard. For help, send your vehicle details and dashboard photos to support@tesery.com.
The overlays are designed to leave the original controls and functions unobstructed when correctly fitted to a compatible vehicle. Stacking them over another dashboard cover or film has not been verified. Contact TESERY before combining accessories on the same mounting surface.

The time estimate covers fitting the overlays. Follow any supplied adhesive instructions for pressing, waiting periods, and aftercare.
Contact support@tesery.com for product or order support, or use the TESERY contact page .
Inspect your order on arrival. Report damage, defects, or an incorrect item promptly, with your order number, vehicle details, and clear photos or video. Contact us before removing an installed product or sending anything back.
Gently wipe with a soft, slightly damp cloth, then dry with a clean cloth. Avoid abrasive cleaning. Before using alcohol, wax, coatings, or other cleaners, check their suitability for your matte or glossy finish.
The overlays are described as removable without leaving adhesive residue. Contact TESERY for removal guidance before taking them off, particularly if you are reporting a fitment or product issue. Reuse of the original adhesive has not been confirmed.
Removing or altering a product before troubleshooting may affect eligibility for a return or replacement.
You may request a return within 30 days of delivery. General eligibility requires an unused item with its tags, original packaging, and proof of purchase. Under the linked return policy, non-quality returns incur a 15% restocking fee, and the customer pays return shipping.
For confirmed defects, shipping damage, or incorrect items, TESERY can arrange a refund or replacement and cover the associated costs. Contact support first for approval and return instructions. See the return policy for details.
These overlays are non-electronic accessories. TESERY's published warranty policy provides a 30-day exchange period for quality issues identified upon receipt and states that installation or expiry of that period ends this coverage. Contact support before installation if you find an issue.
For an issue discovered after fitting, contact TESERY before removing or altering the product so the team can assess your case. Review the warranty policy for the applicable conditions.